Table of Contents
If you own a pool, you know that you don’t just flip a switch and open your swimming pool the moment the weather starts to warm up every spring. There’s a lot of work that needs to be done, which is why many people decide to hire a pool service to do the work for them. However, if you’re interested in doing a little work and saving a few hundred dollars in the process, it’s possible to prepare your pool for another year of fun and relaxation all on your own.
1. Clean Around the Pool
The first step is cleaning up the area around the pool. This includes any kind of debris or clutter that resides around your pool deck or patio. If there are any leaves, tree branches, or shrubbery that could potentially be blown into the pool by the wind needs to be picked up before you get started with the pool itself.
2. Clean the Pool Cover
Next up is the pool cover, which has hopefully held up over the winter. However, odds are there’s going to be something nasty sitting on top of the pool cover that’s mixed in with leaves and who knows what else that accumulated there during the winter. Using either a cover pump or a submersible pump that you can rent, suck up any grotesque looking liquids that are on your pool cover. Fortunately, any dry debris can easily be swept away. Once that’s taken care of, spray down your pool cover with a hose to make sure it’s relatively clean from items you’d prefer not to be in your pool.
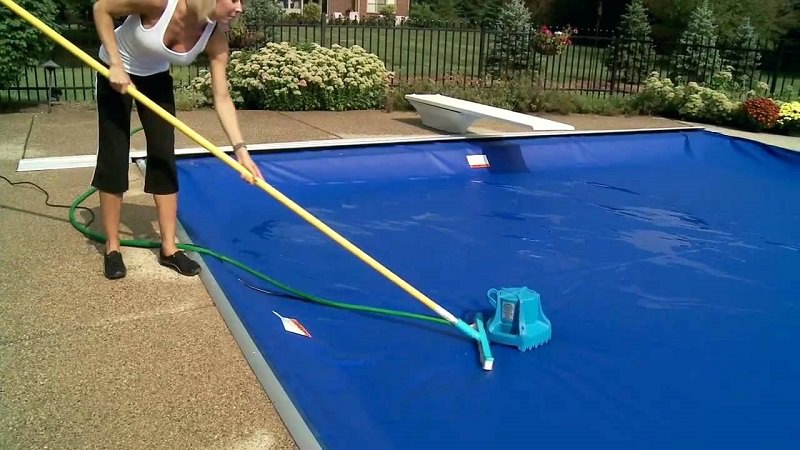
3. Remove the Pool Cover
After your pool cover is clean, it’s time to take it off. Depending on the size of your pool, you may need some help with this. If you have a solid cover, you’ll want to fan-fold it to create folds that are three-to-five feet long. If you use a mesh cover, don’t forget to remove the springs or fasteners before folding the cover like an accordion. When you take the cover off, you’ll want to lay it out flat so you can sweep it and hose it down to give it a more thorough cleaning. Then roll it up as tight as you can and store it away until you need it again next winter.
4. Inspect and Replace
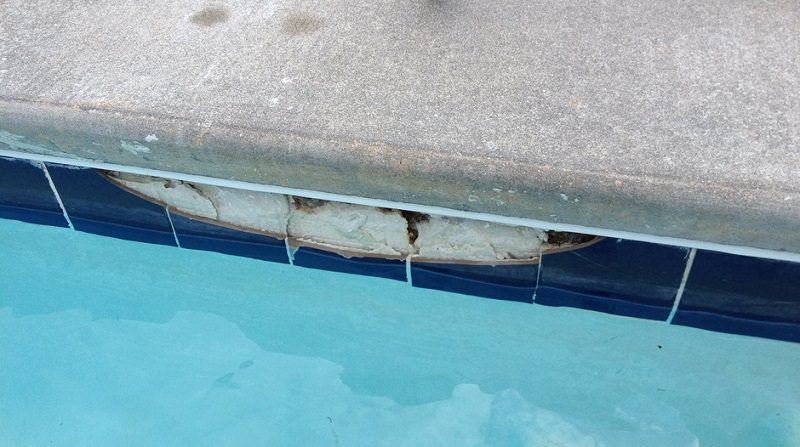
Now you’re finally ready to get into the pool, starting with a basic inspection. Check to see if your filter and pump and incurred any damage over the winter. If there are parts that look worn out, consider replacing them before you get the pool up and running. Also, both fiberglass and concrete pools will need to be checked closely for cracks in the tile, chips in the plaster, or any indentations that don’t look familiar. These are usually minor issues that are easy to repair, but again, you’ll want to take care of it sooner rather than later.
5. Reinstall Pool Equipment
If you removed any equipment from your pool prior to the winter, now is the time to reinstall those parts. This could include any safety rails, ladders for getting in and out of the pool, or possibly a diving board or slide. Of course, you’ll want to clean and polish anything before reinstalling them. Perhaps most importantly, use a metal lubricant on any bolts and make sure you attach everything as tight as possible to avoid any mishaps once you start using your pool.
6. Secure Pump and Filter
The next step is installing any new pieces of equipment you may have purchased over the winter or items needed to replace worn out parts. This could include a new pump, filter, or heater, as well as smaller items like pressure gauges, valves, and plugs. Just make sure that you buy parts that are compatible with your pool and then follow the accompanying instructions to make sure everything gets installed properly.
7. Clean Pool Surface
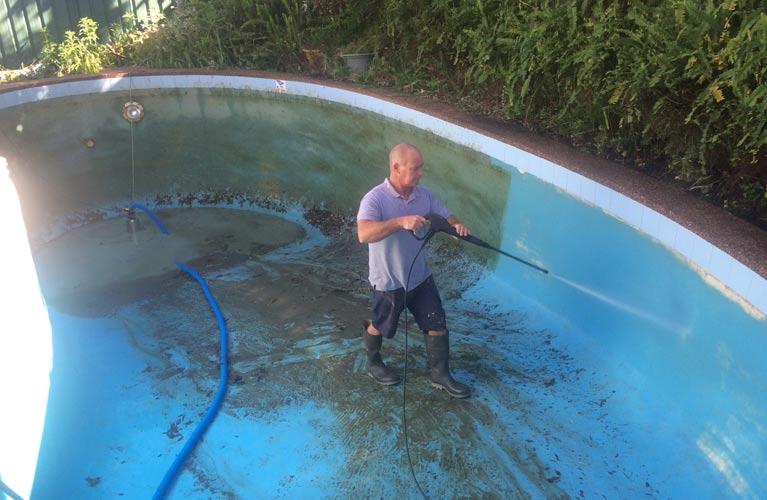
Once you have the right parts and equipment in place, you can get to work on the pool surface. Use a garden hose to fill the bottom portion of the pool with water so you can scrub the twigs, leaves, and other pieces of debris that may be stuck to the bottom or the sides of the pool. If you have a vacuum or algae brush, this is also the best time to use them so that every surface of your pool can be scrubbed clean. Pay particular attention to colorful algae that may be building up. You’ll want to take care of this problem before you start using your pool on a regular basis.
8. Dress Rehearsal
At this point, you’re finally able to start pouring water into your pool. Once you’ve primed the pump, made sure the values are in the open position, and purged air from the plumbing, you can turn on the power and watch the pool fill up with water. However, it’s not all fun and games just yet. As the pool fills up, you’ll want to check for any cracks or leaks. If you spot anything out of the ordinary, you’ll have to turn the power off and contact a pool service company that can fix the problem.
9. Chemistry Test
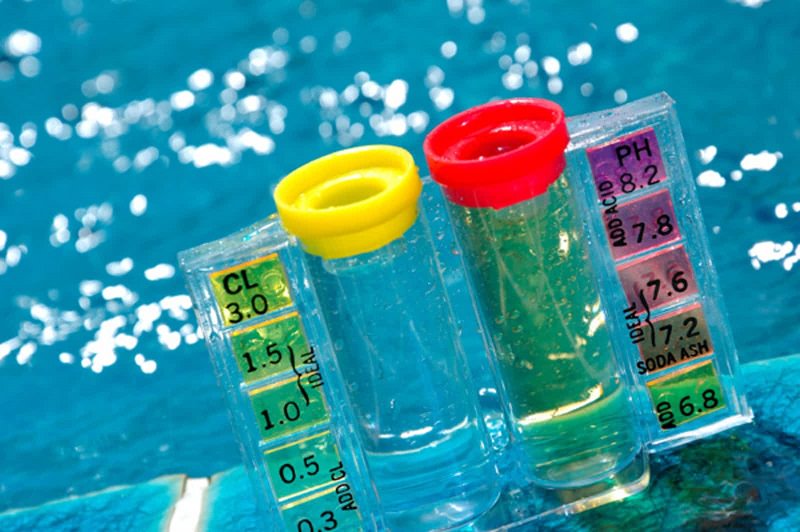
Last but not least, you must check your pool’s water chemistry. You’ll need to run your pool filter for 12 to 24 hours before using a pool testing kit to check your water’s pH level, alkalinity, chlorine content, and calcium hardness. If any of the tests come back abnormal, you’ll want to consult with a pool service company on how best to proceed. You may need to super chlorinate your pool or utilize algicide or a stabilizer in order to get your pool chemistry right. Also, keep in mind that if you use any treatments on your pool, allow your filter to run for 24 hours and then test again to see if there has been an improvement.
10. Jump Right In
After you get your pool’s water chemistry right, it’s finally time to jump right in. If you’ve followed all the steps to opening up your pool, you should have a warm and refreshing pool to enjoy all summer long.
Video: How to Open an Inground Swimming Pool
- Best Pool Test Kits
- Best Algaecide for Pools
- Best Pool Shocks
- Best Pool Chlorine Tablets
- The Best Way to Clean Pool Tile at the Waterline
- Cleaning Algae from a Pool: Pool Algae Types and Ways to Remove
- 7 Reasons to Get a Pool Cover
- Best Winter Pool Covers
- Best Solar Pool Covers
- Best Manual Pool Vacuums
- Best Pool Vacuum Heads